

Late night baking: Brown Butter Chocolate-chip cookies
Needless to say, we are spending a lot of our nights in these days. One of the things I have come to enjoy doing on Friday nights is doing some late night baking. My favorite so far? These classic chocolate chip cookies.
Needless to say, we are spending a lot of our nights in these days. One of the things I have come to enjoy doing on Friday nights is doing some late night baking. My favorite so far? These classic chocolate chip cookies.
Recipe:
14 tablespoons salted butter
2 and 1/3 cups all-purpose flour
1 teaspoon baking soda
pinch of teaspoon flaky sea salt
1 cup + 2 tablespoons dark brown sugar, packed
1/2 cup granulated sugar
2 teaspoons vanilla
2 large eggs
2 cup dark chocolate chips
Directions:

1. Melt butter in a pan (about 2 min) to create aka “liquid gold”
2. Pour melted butter into a bowl and chill in refrigerator for about an hour

3. In a medium size bowl, mix together flour, salt, and baking soda

4. Take the butter out of the fridge and mix together the sugar

5. Add the vanilla bean and eggs, mix together
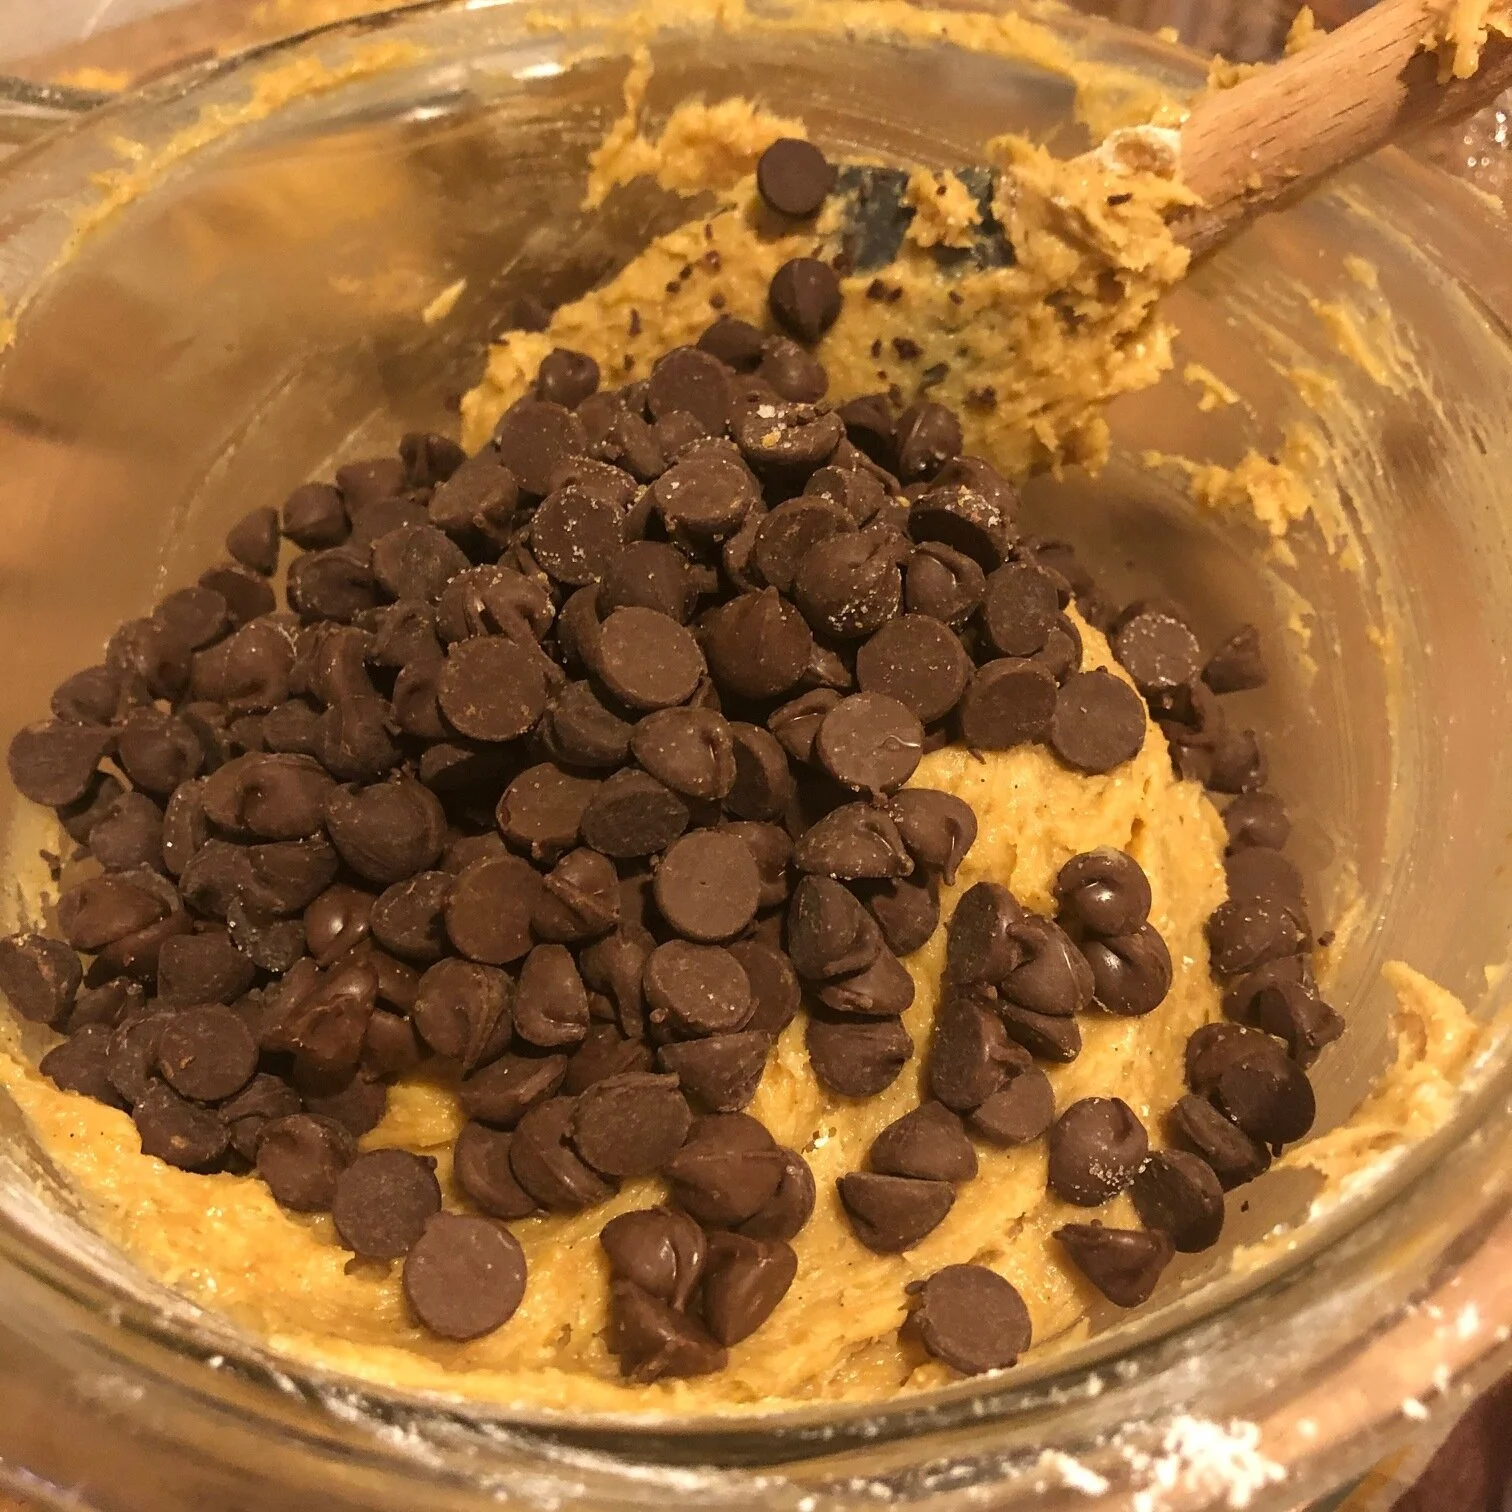
6. Fold in flour and chocolate chips

7. Roll cookie dough into a ball and bake for 10-11 minutes in 375 F (190 C) oven

DONE!!!!!

ビーズアクセサリー
欲しいものを想像して、いいの見つからなかったら、頑張って作る!
今回はビーズイアリングでした!チョーカーも後から作ったけど、基本の作り方はこれと一緒。

欲しいものを想像して、いいの見つからなかったら、頑張って作る!
今回はビーズイアリングでした!チョーカーも後から作ったけど、基本の作り方はこれと一緒。

This is all you need!
Beads
String
Glue
Earring catches
全部Tokyu Handsで買いました!1500円もしなかった!
調べたら色んなビーズ編みデザインが山ほど出てくるけど、ハンズでディスプレイしててた簡単なデザインを使いました。

編みながらストリングをきつく引っ張り忘れないように!
最後にI tied the earringキャッチ。

Then I used the 接着材to glue the other parts and string in place. 一晩寝かさないといけないから、動かないようにタッパーの上にセロテープを貼って、固定しました。

次の日に余ったストリングを切って終わり!
Supa cuteee!!


ジャマイカンココブレッド
子供の頃ジャマイカのココブレッドが私の大好物だった。こないだ急に久々に食べたくなっちゃったけど、日本で見たことがなくて、じゃあ自分で作って見ようかっと思って、作った!

子供の頃ジャマイカのココブレッドが私の大好物だった。こないだ急に久々に食べたくなっちゃったけど、日本で見たことがなくて、じゃあ自分で作って見ようかっと思って、作った!割と簡単に美味しくできたから、皆とシェアします!シンプルなもちもちした、ココナッツ風のパンなので、色んな料理と合う!例えば、タイ料理やカレーやガーリックシュリンプやちょっとこだわったディナーロールにもできると思う。私はジャークチキンと合わせてサンドにした。大成功でした!
Here's the recipe ↓
小麦粉・3カップ
砂糖・1/4カップ
イースト・小さじ4
塩・小さじ1
ココナッツミルク(warm)・ 1. 5カップ
水 (warm)・ .25 カップ
バター・大さじ2 (ブラシング用プラス大さじ2)
ココナッツオイル・大さじ2

1. Dry ingredients (小麦粉、砂糖、イースト、塩)をボールで混ぜます。次に全部少し温めてからadd the wet ingredients (ココナッツミルク、水、バター、ココナッツオイル)。それぞれをレンジで30秒ぐらいかな?

2. きれいなdough ballになるまでよく混ぜて、once it's doneボールから出して、cut it into 10 pieces. Make each piece into a ball and leave it for 10minutes!


3. 10分立ちましたら、それぞれのボールをrolling pinで丸く広げまして、一面にバターを軽く塗ります。そのまま半分におり、またその面にもバターを塗ります。最後にまた半分におります。

4. また10分ほっといてから180度のオーブンで15分〜20分焼きます!終わりー!

10 Unexpected Reasons to Get a Dog
When I got my dog Senbei, it felt like an enormous risk because I thought it was going to be a huge burden to have to take care of him. I realized taking care of him is easy and what he adds to life is absolutely immeasurable.
When I got my dog Senbei, it felt like an enormous risk because I thought it was going to be a huge burden to have to take care of him. I realized taking care of him is easy and what he adds to life is absolutely immeasurable.

1.People will smile at you on the street.

You see a lot of disgruntled faces walking around Tokyo but when they see Senbei, even the grumpiest looking elderly ladies will light up and show you the sweetest version of themselves.
2. You can use your dog as an excuse to get out of anything.
You need to get home early to walk your dog, you can’t make it because you have to take your dog to the vet, the options are endless. Your dog won’t tell anyone, and everyone will think you’re just a responsible parent, which you are.
3. Dogs will always make you laugh.

Senbei learned to turn my floor light on and off using the button that sits on the ground. His confusion of how he was controlling the lighting and mine of why the lights were suddenly being quickly switched on and off was too funny.
4. You won’t ever have a bug problem.
Senbei is a master of finding any small moving thing so if you’re having trouble following the mosquito that has been flying around your house, your dog will track it down for you, no problem.

5. You’ll be healthier.
Going on walks with your dog, or runs if your ambitious, will keep you healthy and they’ll keep a close eye on how much you’re snacking which will help you be more aware too.

6. You’ll know all the best spots in your neighbourhood.
There are so many great spots: coffee shops, record shops, clothing stores, tart cafes, hidden restaurants, plant stores around my neighbourhood that I would have never known about unless I had been walking around with Senbei.
7. Dogs will make you a humbler and more tolerant person.
Picking up dog poop every day and accepting that your socks will continuously get stolen will definitely center you and help you exercise extreme levels of humility.

8. You’ll always have someone to comfort you and keep you company.
I am never bored when I’m with Senbei. He’ll react to movies we watch together, he’ll get really into the music we listen to, he’ll snuggle up to me while I read or do work especially when he senses I’m stressed, and he’ll follow me everywhere in the house. Everywhere.
9. You’ll be protected against anything.
Senbei will bark and scare away anyone that comes to the door or balcony and any ghosts that he senses in the room, so I always feel safe sleeping. Even when I’m not home, I’ll know when he’s protecting the house from something because my Furbo will tell me.
10. Your house will stay somewhat clean.
When you have a dog, you’ll quickly realize you can’t leave certain items out because your they might get to them. Senbei likes to find tissues, masks, and dirty socks laying around so I’ve gotten much prompter and more assertive about cleaning up and I enjoy a more minimalist lifestyle thanks to him.


Minimalist House Plants
To me, plants are the best thing to get for your house because they give life to any space. I think we can all appreciate the importance of having a therapeutic home space and to do so, my number one recommendation is to get some plants.
To me, plants are the best thing to get for your house because they give life to any space. I think we can all appreciate the importance of having a therapeutic home space and to do so, my number one recommendation is to get some plants.
Right now, I like having more minimalist yet interesting plants inside and my lusher plants outside because they seem to like it more out there. These are my favourite indoor plants:
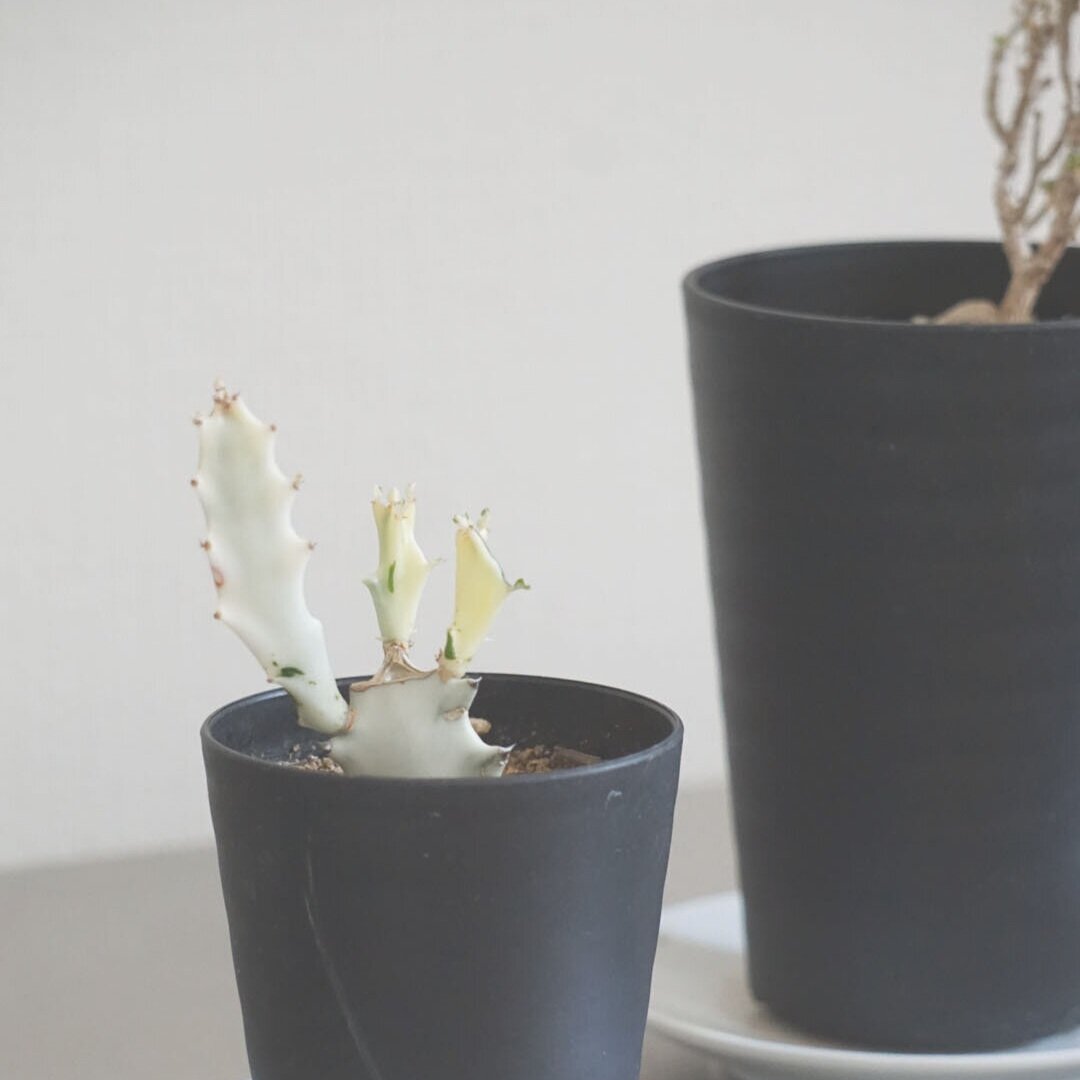
I love the unique colour of my White Ghost cactus and I’ve seen others that have grown quite big (its maximum height is 3m).

My African Bonsai is the newest member of the family. It only grows to about 20cm but apparently will bloom bright pink flowers in spring so I’m looking forward to seeing those.

Lastly, this is my Ponytail Palm. It’s very low maintenance like the other two and has stayed perfectly healthy in the two years I’ve had it. This palm adds interesting character and I especially like its big chunky roots.

Making Nerikiri
I tried making Nerikiri for the first time and it turned out much cuter than I expected! You make the dough just by heating and mixing a little rice flour with water, sweet white bean paste, and a little liquid food colouring.


I love sweets but I don’t particularly like really rich sweet things, because even if they taste amazing, I feel gross after. So, I’m always eating Japanese sweets which are much more on the subdued sweet side and not nearly as guilt inducing. Another plus is that you can make them without much equipment or a lot of waiting! I tried making Nerikiri for the first time and it turned out much cuter than I expected! You make the dough just by heating and mixing a little rice flour with water, sweet white bean paste, and a little liquid food colouring. The shaping begins by separating out your colours for the different parts of the Nerikiri you’re making. I separated my colours for two separate uchiwa (Japanese fan) nerikiris.

1. Gently knead your background colours separately until they feel soft and doughy (about 5-10 times). Take the colours you want to build your background with into your non-dominant hand and use the palm of your other hand to squish them together pushing into the side you want to blend into the other side.

2. Use your finger to blend the colours together evenly and flip it. Make a bowl shape to put your sweet bean paste in the middle of. Also, make sure your bean paste is refrigerator temperature otherwise it’ll get everywhere. Gently mold the sides up around the bean paste until you can cover it.

3. Squish the front gently onto a flat, damp, wooden surface to make a flat canvas.

4. Cover with a damp, clean kitchen cloth and push your thumb into the base to impress the towel wrinkles. I didn’t get great results…I think my towel was too thick.

5. Lastly, use a toothpick to make the fan lines and stick your decorative pieces on the surface.
Enjoy with some green tea!

Longterm Relationship (beauty products)
There are a couple things that I have never stopped using or have continued to restock on ever since I started using them. They’ve been loyal to me and do everything I want and more.
Whenever I run out of some cream, makeup, shampoo, or whatnot I’m usually going to try something new either because I’m unsatisfied with the last one or I’m curious to see if I can find something better. But there are a couple things that I have never stopped using or have continued to restock on ever since I started using them. They’ve been loyal to me and do everything I want and more.


First is my Product Hair Shine Serum. I use hair oil a lot, but I don’t like having to wash the oil off my hands all the time after applying it. But this oil is in a spray bottle, so I don’t have to touch it and it gives a nice medium oil shine, not too heavy where it looks wet but enough to look sleek. My hair also doesn’t get weighed down by this oil or feel greasy to the touch.
Second is my Lucas’ PawPaw Ointment. I first got this ointment as a gift from Australia about three years ago and everyone was using it as lip cream which it is great as; it’s not too sticky or waxy and gives a nice natural sheen and it’s healthy for your lips. But the best part is not that, the best part is that it doubles as a bug bite/cut remedy. I put this on my mosquito bites and they stop itching within a minute.

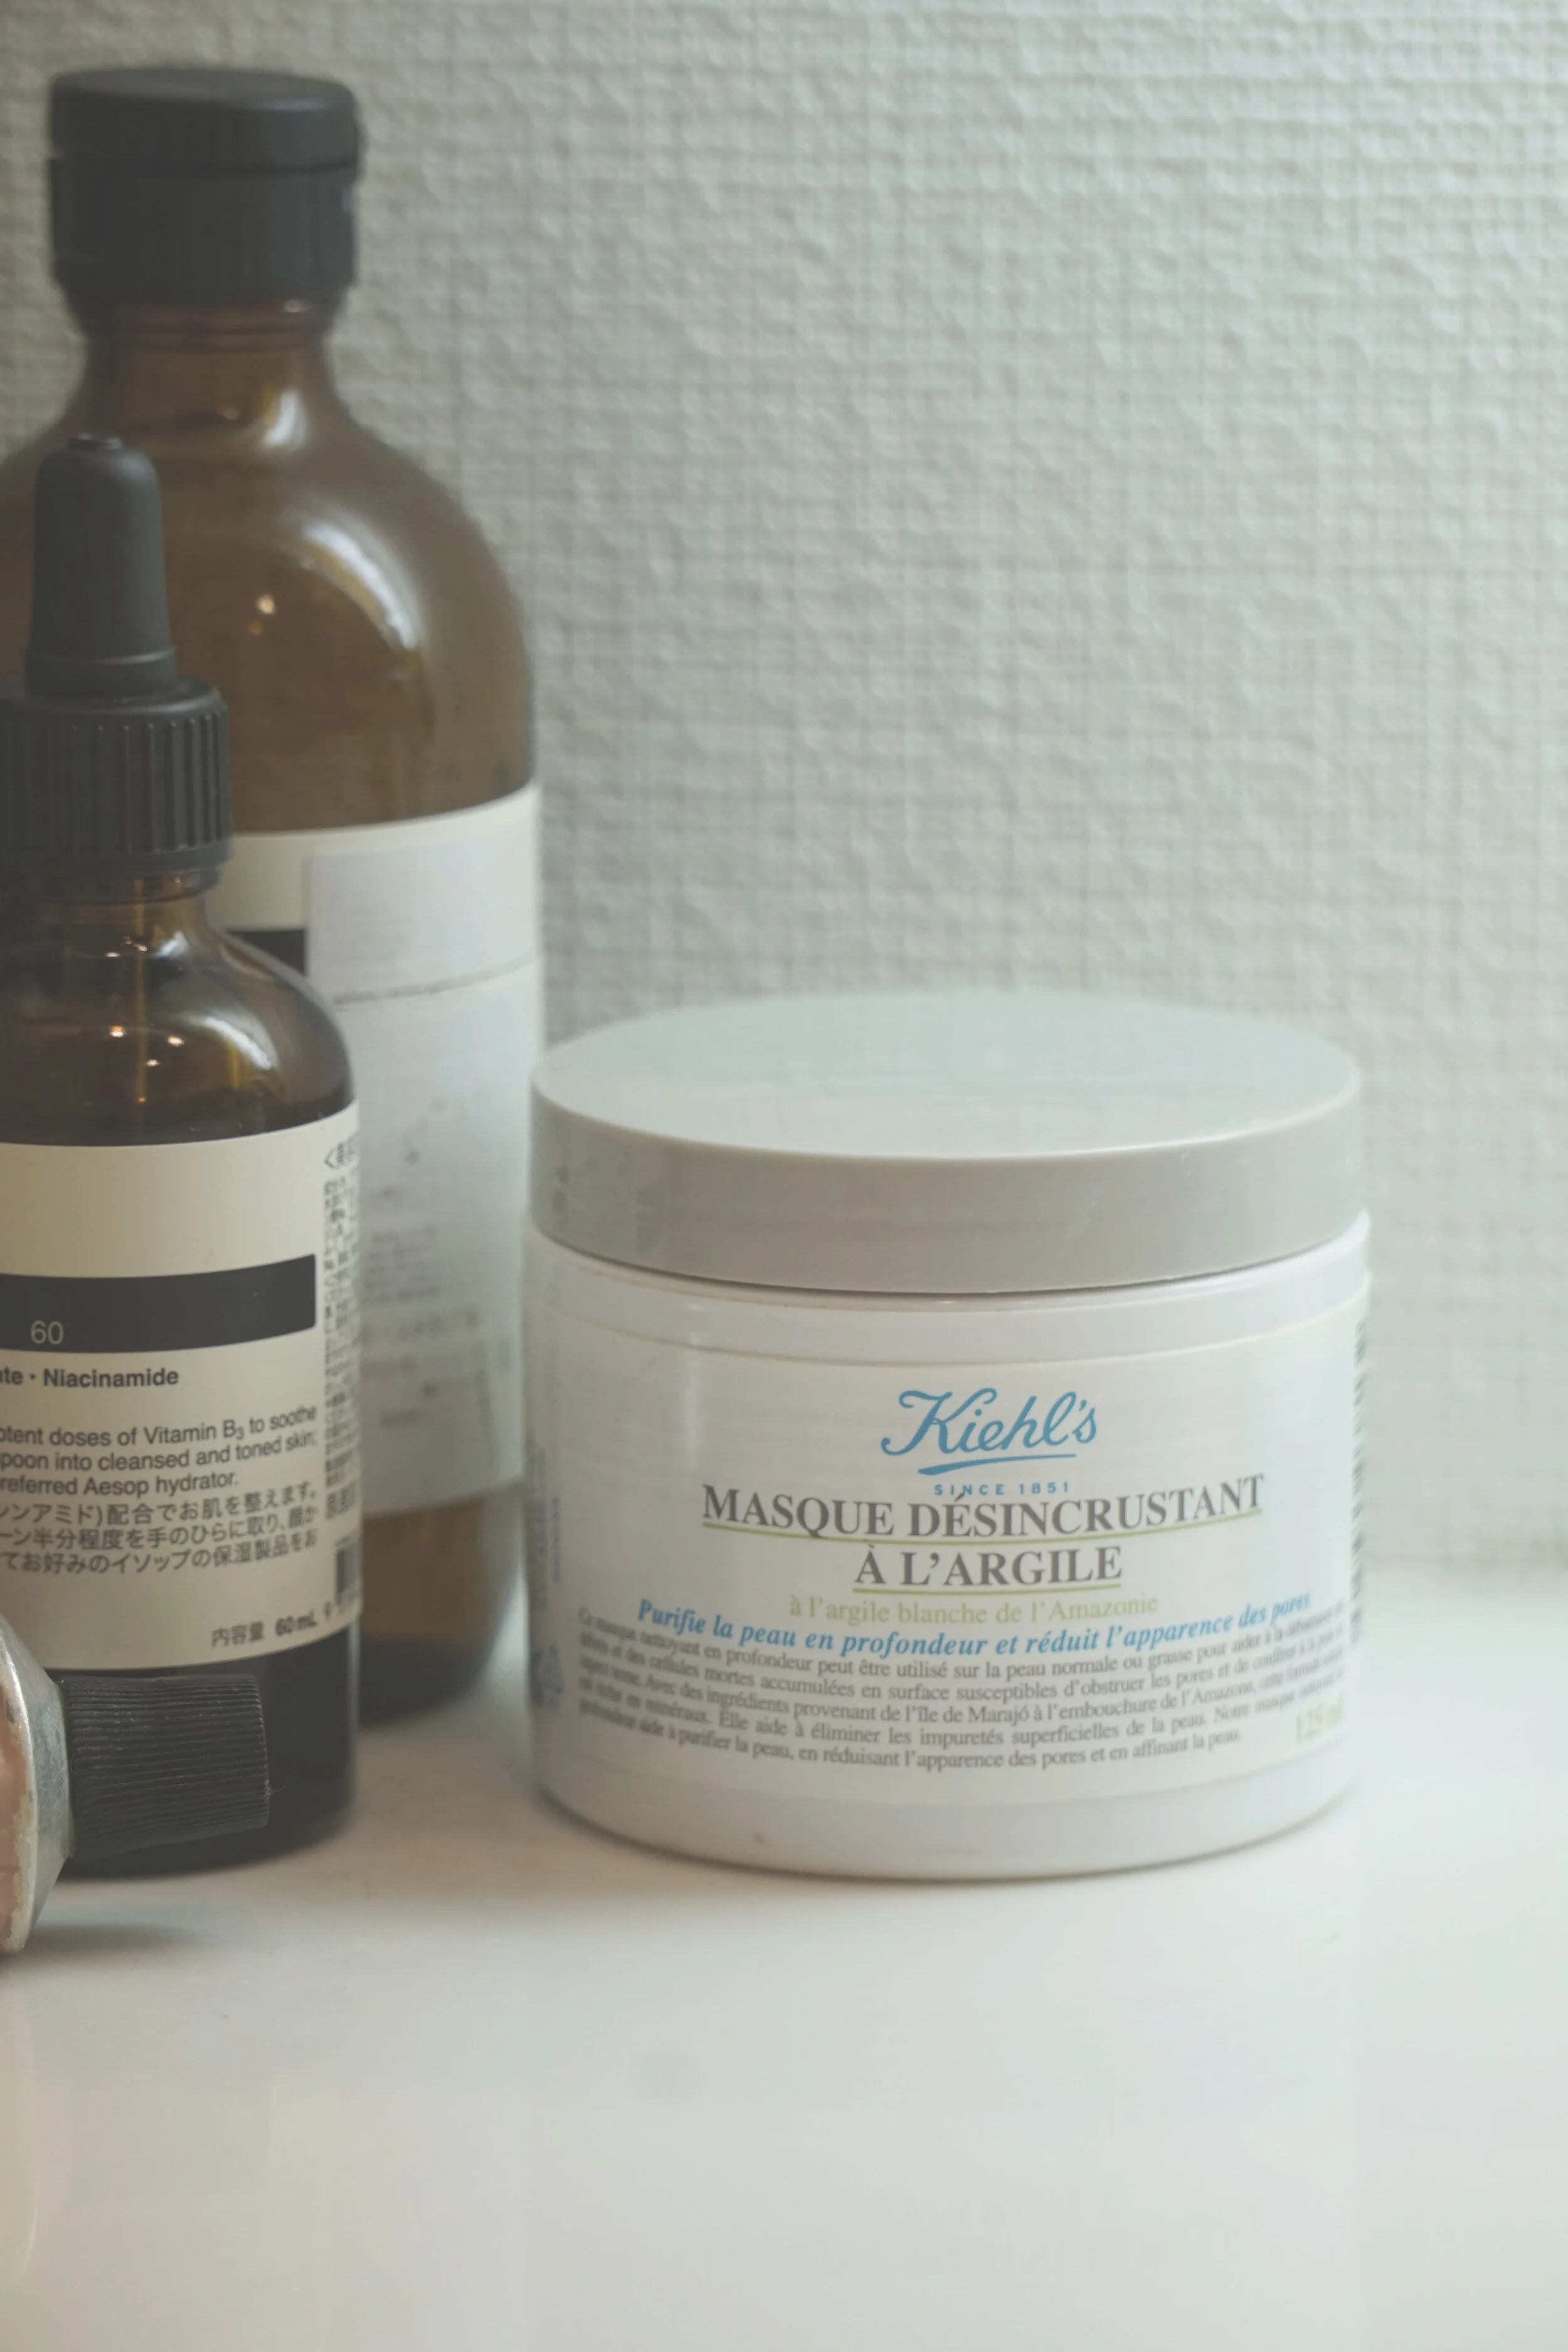
Third item is my Kiehls Rare Earth Deep Pore Cleansing Mask (sorry the image is in French, I got it in Canada). I’ve been using this about three or four times a month for the past seven years. This product has been with me the longest by far. It cleans out the pores, especially around my nose, so well, it also gets rid of any redness in the area. I’ve never found anything else that cleans out my pores so instantly without causing any damage. Nights before a closeup shoot, I always use this.
My last long-term beauty product relationship is with my Refa. It’s a face massager that uses microcurrents to get rid of any swelling and it works. When I first got it, I was always doing one side at a time so I could have fun seeing the difference. I use this right before shoots but also on my neck whenever I have tightness or headaches and it always helps.


Happy birthday hazelle
It’s been a crazy but fulfilling year<3
I didn’t think the brand was perfect and ready to launch when it did.
I would have kept refining or making changes to the products if it wasn’t for my friends who PUSHED me to get it started.
hazelle turns 1 today!
It’s been a crazy but fulfilling year<3
When I launched hazelle, I didn’t think the products were ready to be released.
I would have kept refining or making changes to the products if it wasn’t for my friends who PUSHED me to get it started.


hazelle launch party at Nakameguro Lounge, June 2019
Once I’ve made that leap, and hazelle was recognized by my peers and real customers, I was faced with a new level of decision making and responsibilities—
From factory runs to customer service and department store pop ups, a lot of people got involved. Managing hazelle was a huge learning curve for me and it happened so fast.
Looking back, I’m glad that I was forced to put my vulnerable self out there. This year made me realize that the products are never finished or far from ‘perfect’ because it constantly grows.

DIY business cards with custom made stamp from Tokyo Hands.
Making small batches of everything takes time and a lot of work. But this was ideal for my small business because it allowed me to revisit the designs or content and tweek them until they were perfect!


The love that hazelle gets from customers are truly gratifying, and it gets me motivated.
The brand connected me with amazing people I would have never met or worked with otherwise.

photo by Mott House Tokyo
And we’re just getting started!
As I expand the next production, I want to prioritize establishing a fluid production so I can focus more on developing new products and building a strong community around the brand.
Here’s what I learned through this experience-
Your fabulous ideas will never be realized unless you put it out there. Out of your mind, on the paper, and in action. It’s ok to mess up. It’s ok to ask for help. People will recognize how much you believe in your idea if you can show it! The work you put into it will never go to waste because it is yours and it will always be a part of you.
Never give up. Do it out of love, believe in yourself, and I promise that things will start to fall into place!

Sew FYI- a co-working studio in a warehouse building in Downtown LA. I found them when I needed to fix a sample before visiting the factory. They have all your sewing needs and assistance to finish your project!
Special thanks:
I couldn’t have done this with out the continuous love and support from my friends. Thank you for pushing me and believing in me.
Thank you to hazelle customers who always inspire me and makes me want to do better.

8 steps for moving
I love the complete fresh start moving gives you. You get a great excuse to thoroughly declutter, which cleanses both your physical and mental space. In my next place I want to only have things I like looking at such as art, plants and cool electrical appliances.
I love the complete fresh start moving gives you. You get a great excuse to thoroughly declutter, which cleanses both your physical and mental space. In my next place I want to only have things I like looking at such as art, plants and cool electrical appliances.
So, here’s my two-week method I'm going through to make my next space the most calming and beautiful space for optimal levels of happiness.

1. Put on some music, make a nice drink, and enjoy the process! This is a pivotal moment, make sure you make the most of it!
2. Dig deep in one room at a time but start small. I started in my toilet room with the cabinets, then I did my bathroom starting with the drawers. I had bags of old cosmetics I finallyyy dealt with.

3. Separate all your things into four piles: now, later, give, garbage. In other words, what I need until I move, what I need but not imminently, what I don't need but could give away/sell, and garbage.
4. Say goodbye! Be strict when deciding what to keep and what to give up. If you have memories with something but don't see it in your next space, take a picture, show gratitude, and say goodbye. My rule for clothes is if I haven't worn it in the past year then I'll never wear it.

One of my model houses. Goodbyee

5. Next work on the big things-furniture. Imagine what you want your next place to look/feel like. Maybe think about a place you've been to before that had an atmosphere that spoke to you. Then, when deciding about each piece you have, mentally check if it matches with what you imagined. If it does, awesome, keep it. If not, give thanks, say osewaninarimashita and send it on its way to its next home.

6. Take pictures of everything you want to give away/sell and post it/send it to friends/family so they can claim what they want and give it to them. Both the person you give to and the item you give will be happy. Post the rest to sell. Use Mercari for things you want to get money for (be prepared for bargaining), and Jimoty for things you just need to get rid of (I'll usually post it for free).

7. Make an excel sheet for what you plan to get rid of and what you plan to buy. Check that you’re happy with the balance of the number of things you’re buying vs. getting rid of and earning vs spending.
8. Make a list of your remaining todos. Here are some basics:
Set up internet in your next place
Call all your utilities to tell them you're moving
File the tenkyotodoke (転居届) at the post office or online with e転居
Get curtains
Ask any available friends for help on moving day
Move!

Homemade Japanese Pepper
I saw a big box of sansho in the grocery store and I decided I was in the mood to prepare a year’s worth of it.

山椒
Sansho
I saw a big box of sansho in the grocery store and I decided I was in the mood to prepare a year’s worth of it.

Sansho is Japanese pepper and is one of my favourite ingredients. It looks like little green peppercorns but it’s soft and has a nice bitter kick to it. It goes with everything. My top Sansho specialties are sansho potato salad, sansho peperoncino, and sansho with white fish. Sansho can only be harvested May through July so if you hoard them now, you can prepare them and store them so you can use it throughout the year.
Ingredients:
Sansho no mi (the raw peppercorn), salt, soy sauce, olive oil, vinegar, and sake.
And depending on how much you want to prepare, set aside lots of time. Do this on a day where you don’t have anything else to do and can just enjoy the process, because it’s a bit of a test of patience.

This is what you do.
They come in bunches so start by rinsing off any dirt or grime that might be left and then pick the peppercorns off. It’s okay to leave the little stems on the sansho. They’ll look like tiny little green cherries. I did 500 grams and it took maybe two hours with breaks~
Next, put them in boiling water with a couple pinches of salt for 6-7 minutes or until you can squish one in between your fingers.
Drain, rinse, and pat em all dry with some paper towels.
Now for the flavour variations.

SALT
Fill half your jar with boiled sansho, add a generous couple pinches of salt then fill the rest with more boiled sansho. Next, close and shake your jar until the salt is evenly spread around inside and you’re done!
ready in : 10 days, lasts: 1 year, use: potato salad.
SOY SAUCE
Fill your jar with boiled sansho and then fill it with soy sauce.
ready in : 10 days, lasts: 1 year, use: white fish.
OLIVE OIL
Fill your jar with boiled sansho and then fill it with olive oil. Done.
ready in : 2-3 days, lasts: 6 months , use: peperoncino
VINEGAR
Okay this one takes a tiny bit more work but still, super easy. Prepare one-part sansho, one-part vinegar, and one-part water. Heat the vinegar and water in a pan, once it starts to boil put the sansho in. When it starts to boil again, turn off the heat and wait for it to cool then put it in a jar.
ready in : 2-3 days, lasts: 3 months, use: pickled anything(fish, cucumbers, daikon…)
SAKE
Put 5% the amount of your sansho of sake in a blender along with your boiled sansho and blend.
ready in : immediately, lasts: 1 year, use: tofu/salad


Rosemaries from rosemaries
The rosemary plant on my balcony has survived through it all. The blazing sun and humidity, the crazy snow days, and weeks of drought due to a busy month at work. Not only is it resilient, but it also acts as a natural mosquito repellent, and needless to say a wonderful herb to cook with.
Rosemaries are my favorite herb.
The rosemary plant on my balcony has survived through it all. The blazing sun and humidity, the crazy snow days, and weeks of drought due to a busy month at work. Not only is it resilient, but it also acts as a natural mosquito repellent, and needless to say a wonderful herb to cook with.

Not only has it survived, it has grown in size over the past several years. So when my friend asked me where I got my rosemary plant, I thought it was time to propagate.
👈This is my OG rosemary plant. From this guy, I will be snipping off a few branches to propagate.
Here is a easy 5 step guide on how to propagate rosemaries from stem.
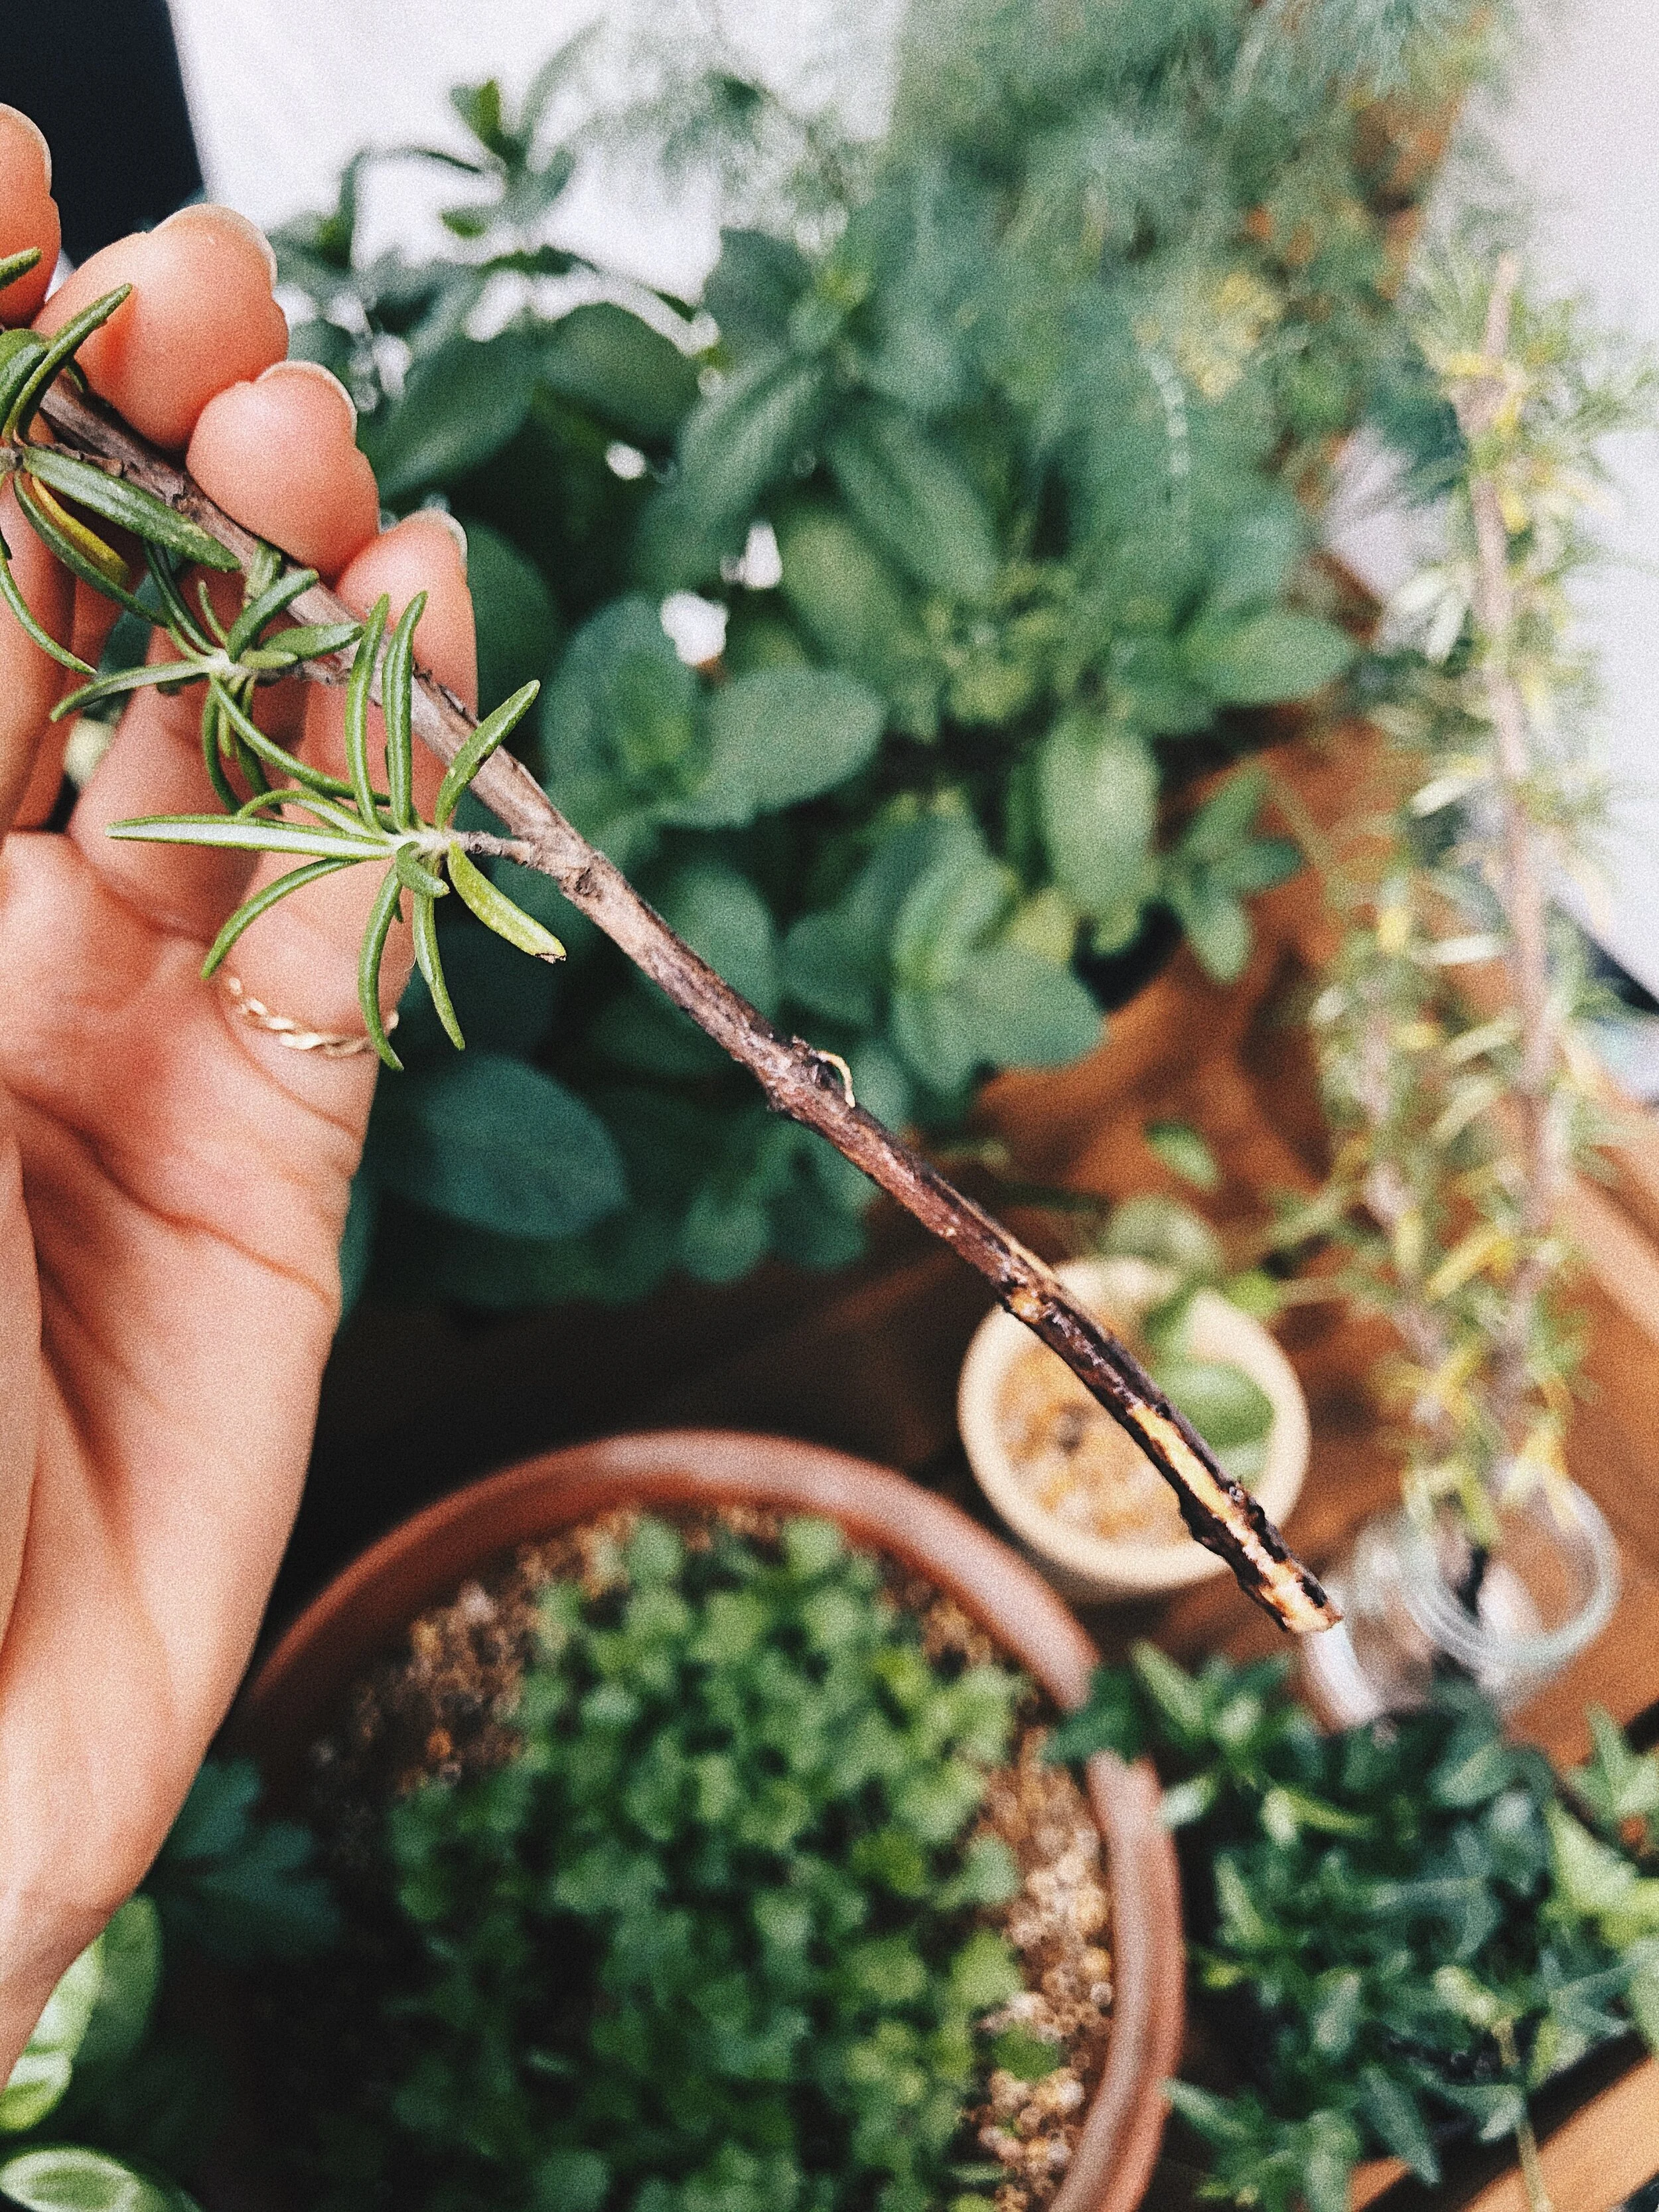
Step 1.) Take a clean pair of scissors and snip off a few branches. I suggest cutting a few branches in case some fail to root.
Step 2.) Peel off the leaves at the end of the branch and use your scissors to strip the brown part of the edge of the branch.

Step 3.) Put the branches in a jar of water and leave it in a place that gets sunlight. Change the water every few days to keep the branches from rotting.
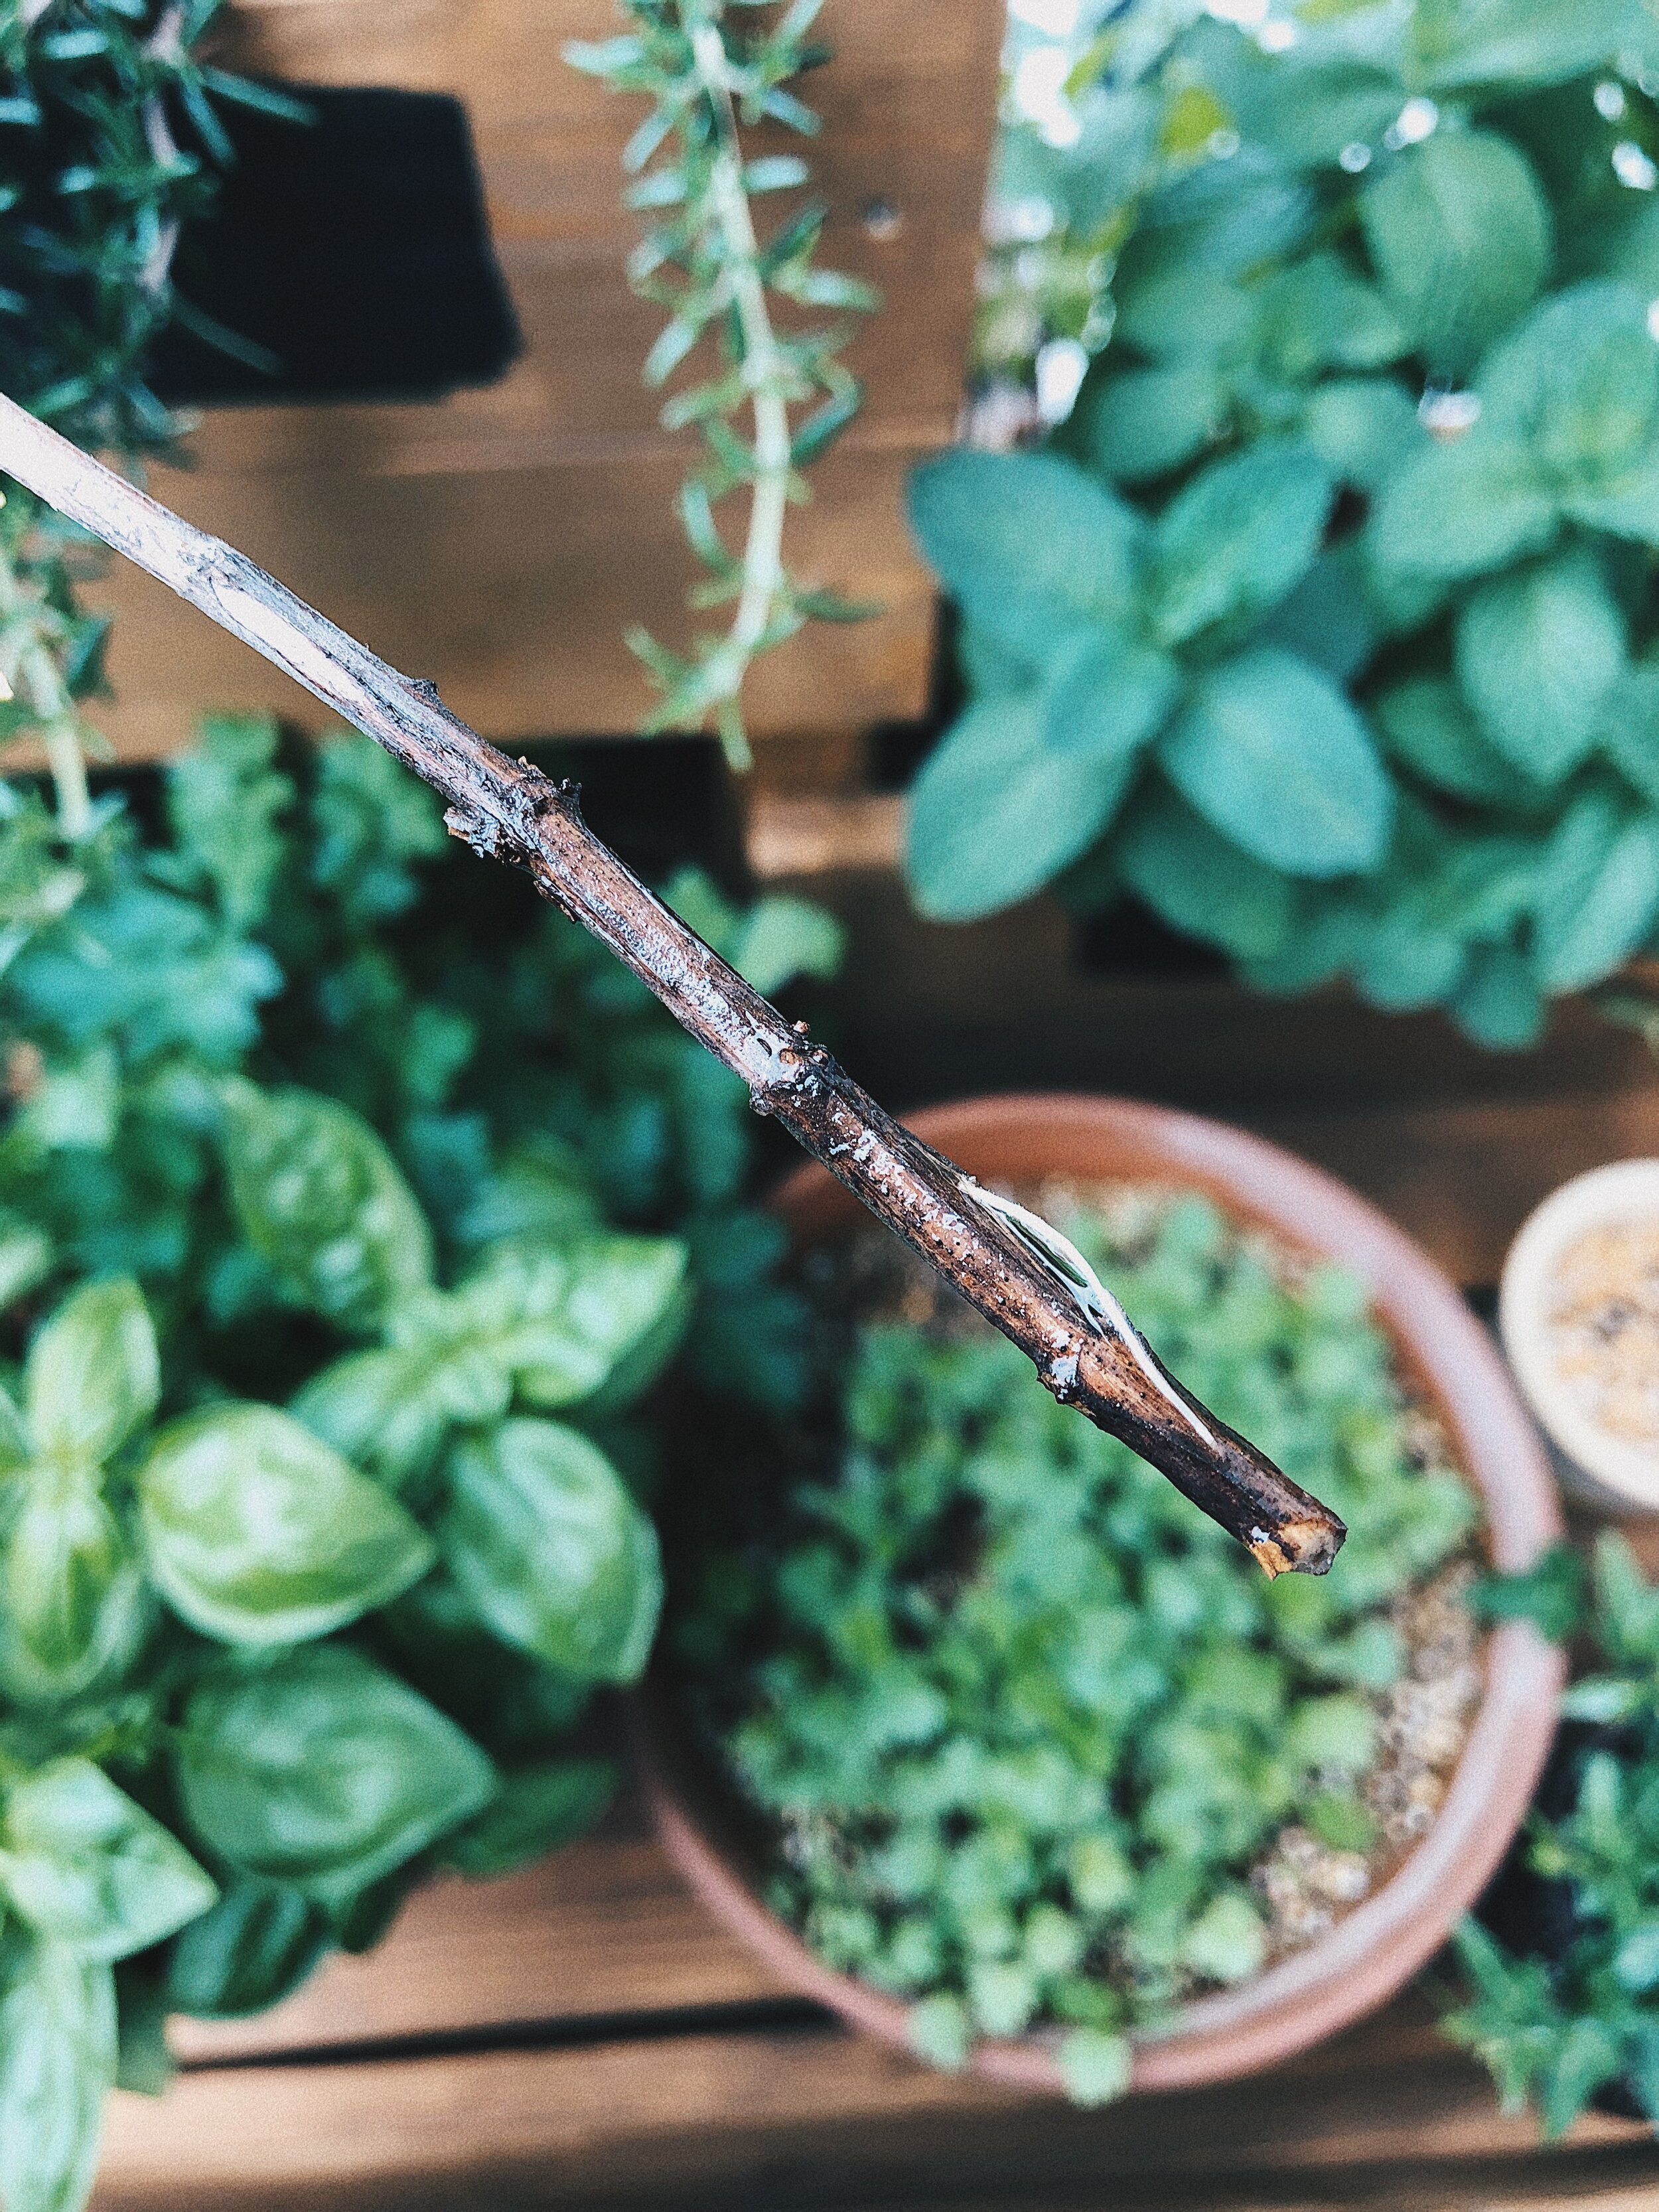
Step 4.) After a few weeks, you should see some rooting. If your branch has not turned brown but yet to root, give it some more time.

Step 5.) Time to plant the branches in soil! Give it plenty of water and love and watch it grow

Blog entry no. 1
I’m moving to a new apartment soon so today I was going through my closet, looking for things that I know I won’t wear anymore, trying to narrow down my pieces to the ones I know are my style.
This is the first blog I’ve ever written. I was pretty weary of the idea when Naomi first mentioned it because I’m not a natural writer but on the walk home while thinking about what blogging would be like, ideas that I wanted to share started pouring into my head. I forget to look where I’m walking my head gets so caught up in ideas of what I want to create. I love making new things, experiences, challenges, dreams so… welcome to what I think is going on in my head!
I’m moving to a new apartment soon so today I was going through my closet, looking for things that I know I won’t wear anymore, trying to narrow down my pieces to the ones I know are my style.

I’ve been a model since I was three so for auditions and meetings and all I’ve always been guided in what I should wear. I think I developed a habit of always thinking about what other people wanted to see and shopped for that. I missed out on figuring out what I liked. So I always admired the people around me who looked like they created their own style.
Tokyo is different from all the other places I've lived. In the other places, most people wore what the trend was, what was expected, or what was practical. People in Tokyo are like that too but there are many more people who wear what they love and I love them.
I want to find and wear things that feel completely me from now on. I want to wear what I feel good in and make my own fashion style as I continue in my Tokyo life. And I want to see more of those people feeling and loving what they're wearing and being fashionable as fuck.

a friendly reminder
I remember the pre-Instagram days when I would spend hours reading through posts about travel, recently curated playlists, various thoughts and feelings from both favorite and random blogs. And at the end of it, rather than feeling FOMO, it would leave me feeling inspired to travel to another country or grow an avocado plant.
I forgot how much I missed blogs until Naomi approached me to be a contributor for Hazy Days.
I remember the pre-Instagram days when I would spend hours reading through posts about travel, recently curated playlists, various thoughts and feelings from both favorite and random blogs. And at the end of it, rather than feeling FOMO, it would leave me feeling inspired to travel to another country or grow an avocado plant.
Maybe this sense of missing blogs so much comes from nostalgia. Maybe because since being on lockdown, I have never had so much time at home since college. Or maybe it’s not just me and there are more people out there that have missed blogs just as much as I do.
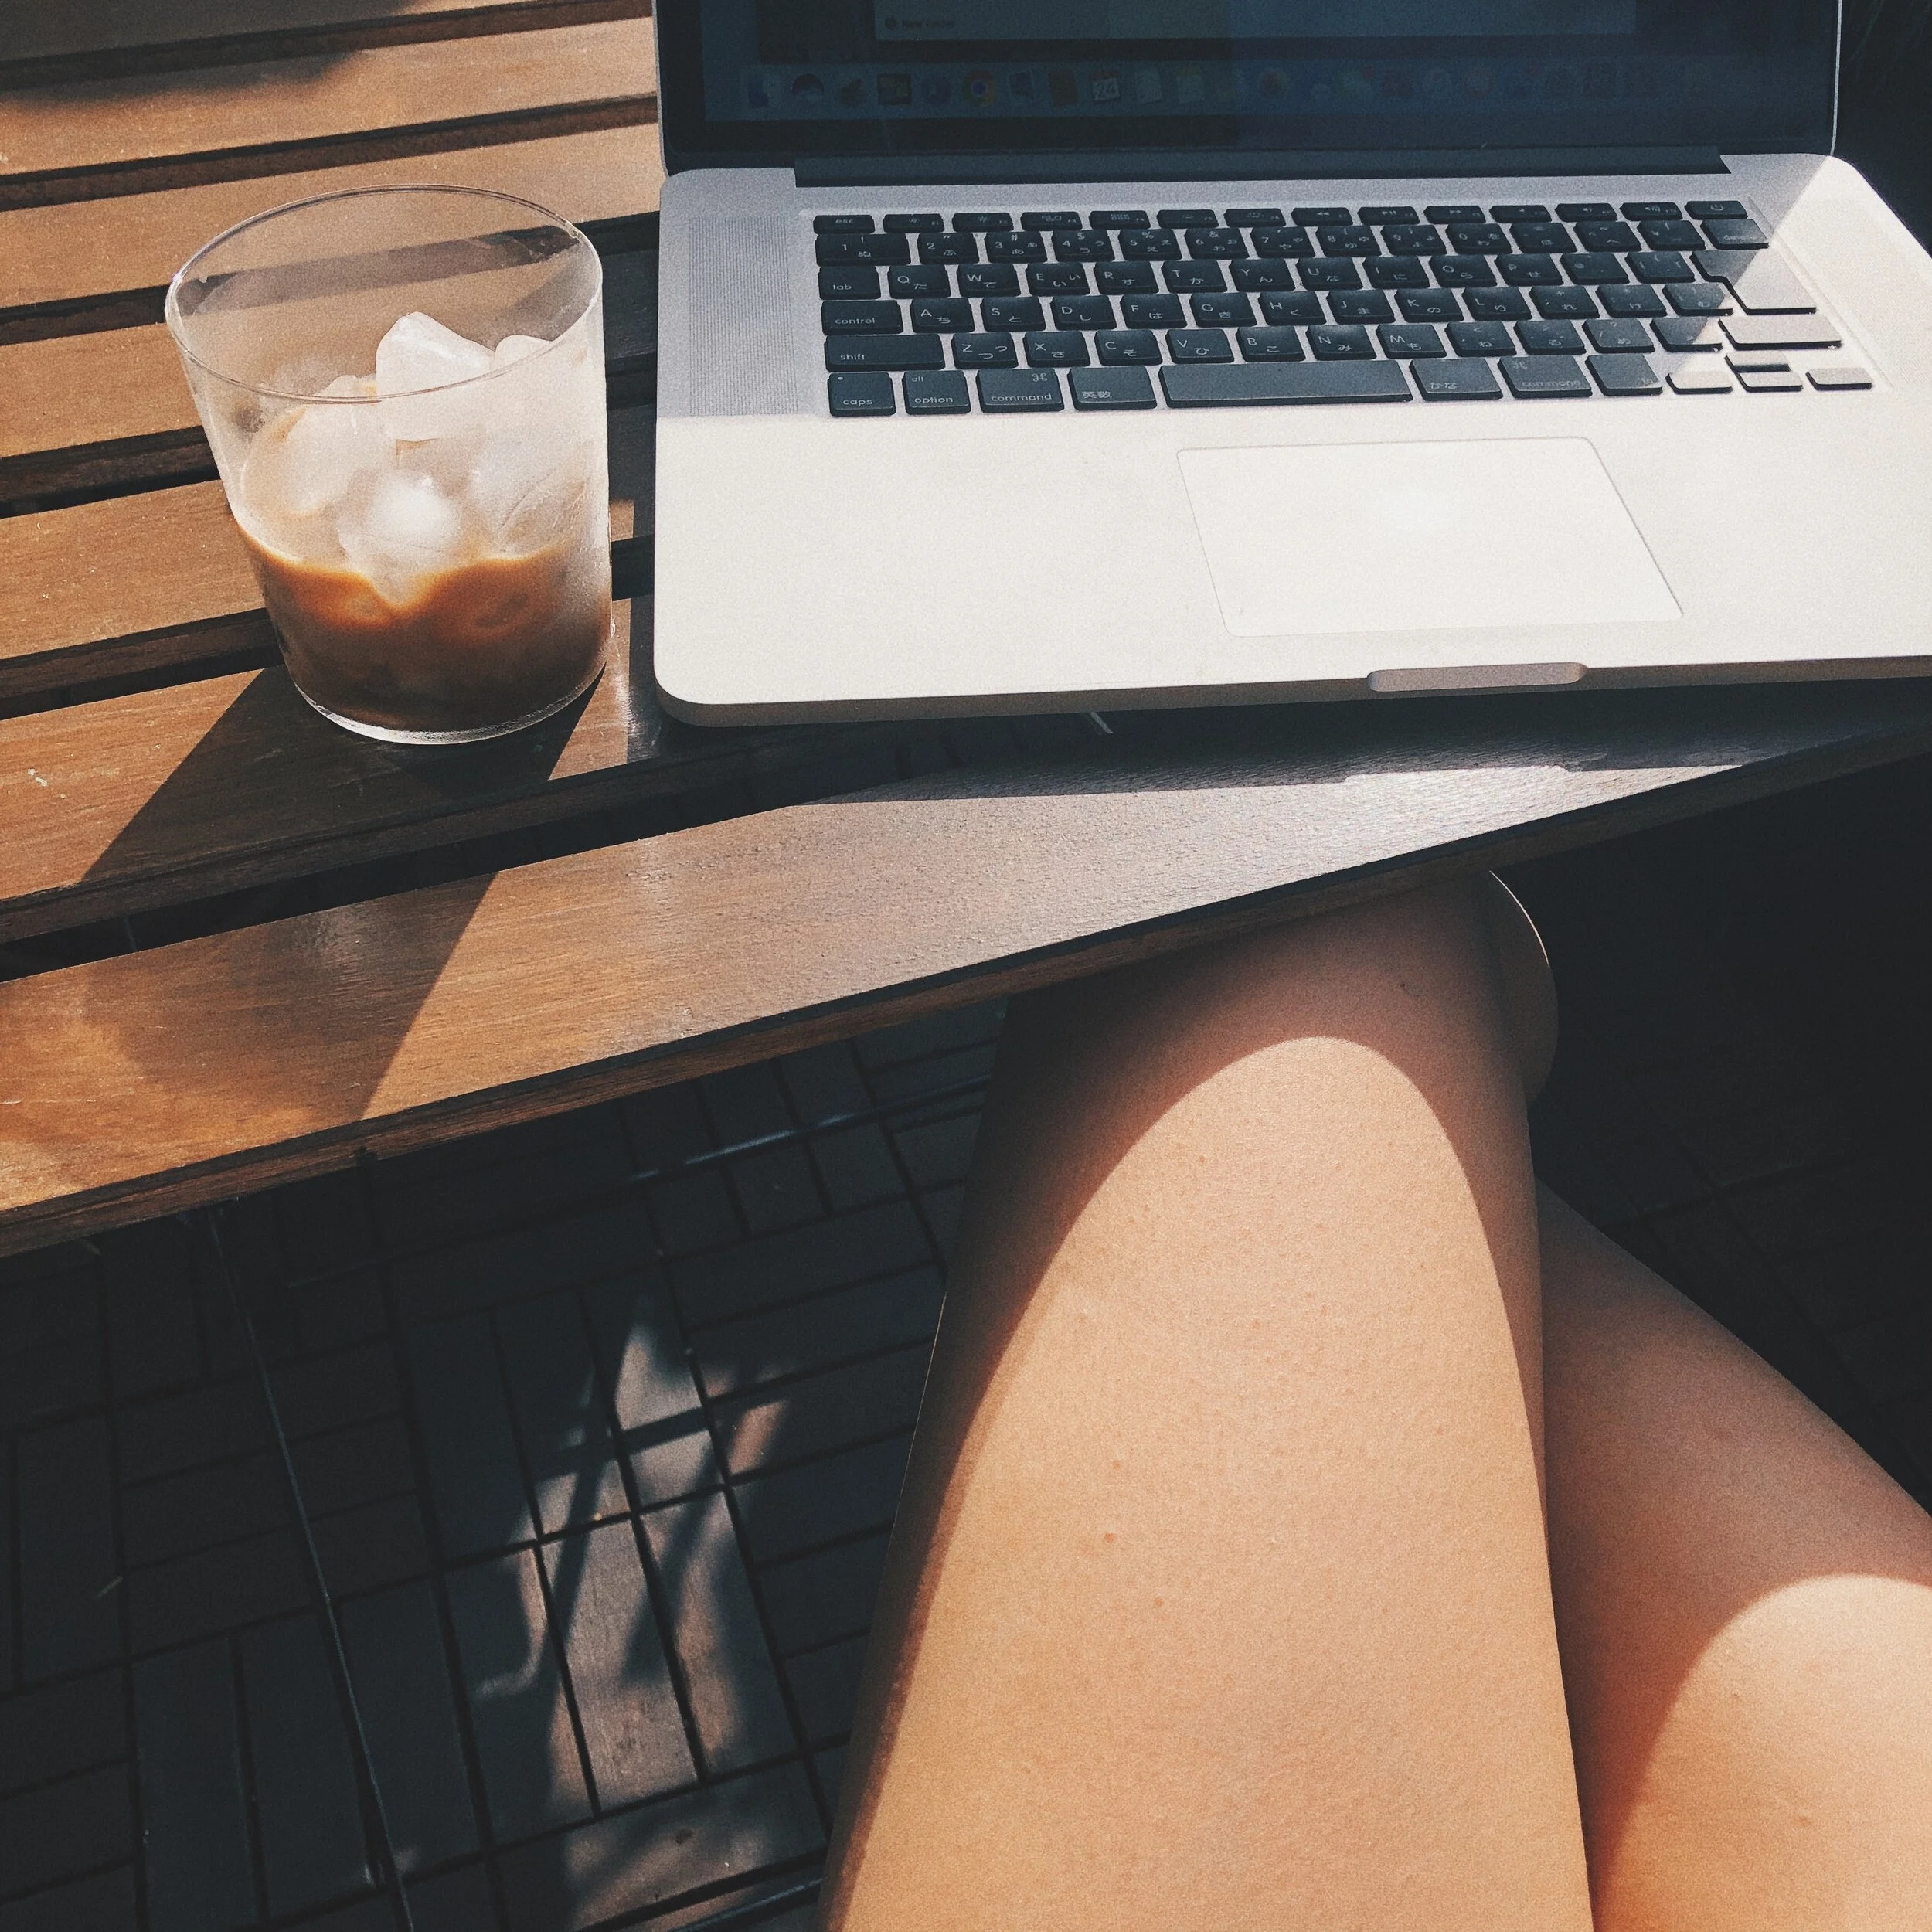
Now as I write this, life is slowly going back to normal. I hope that even in the post-COVID world, I can still keep that sense of slow living - to wake up and enjoy a cup of coffee on the balcony, stare at the ceiling and listen to a really good playlist, or tie-dye my socks just because. I hope that Hazy Days will be a reminder and inspiration to everyone (myself included) that even when the masks come off, to remember to stop and smell the flowers.